
Sewing Your Own Cloth Pads: Part 3
Kaity Japikse, TCO Advocate
This is part three of a series on sewing your own cloth menstrual/bladder control products. Like cloth diapers, many folks find cloth pads to be more comfortable, environmentally friendly and cost-effective. Creating your own from unused items around the home or from the thrift store adds to the cost savings even further. My second post showed how to cut the necessary materials and finally we will assemble them in this post As a reminder, I’m using the 10” straight flare pattern from The Happy Hippos. Becky was generous enough to allow me to show her pattern pieces in the photos below. Other resources if you’re interested in sewing cloth pads are the facebook groups Sewing Cloth Menstrual Pads (for menstruating folks only) and Sewing Incontinence Bladder Pads. Their files and discussion go further in depth on materials you can use, available patterns, layering your pad and more advanced techniques.
Before You Begin
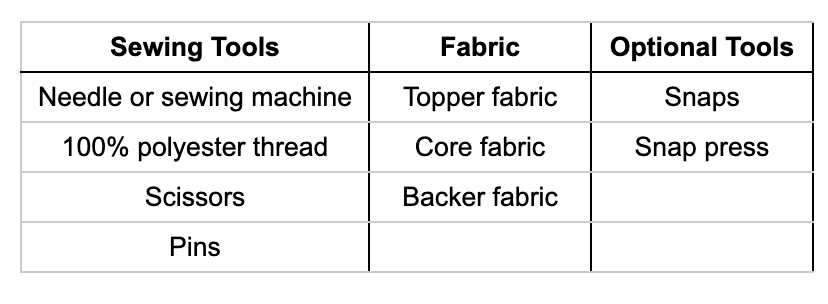
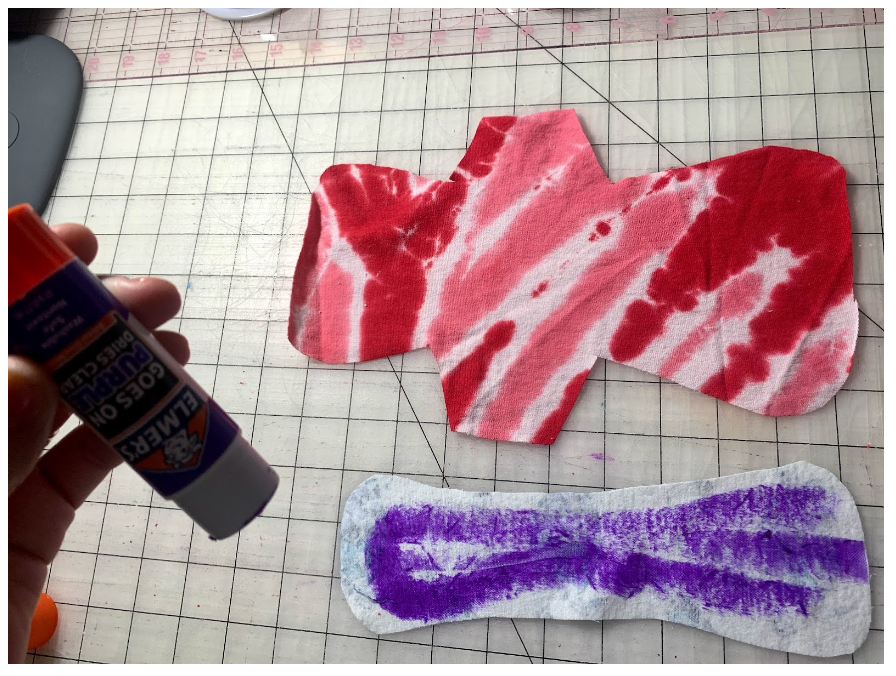
Here are the materials we’ll use for assembly:
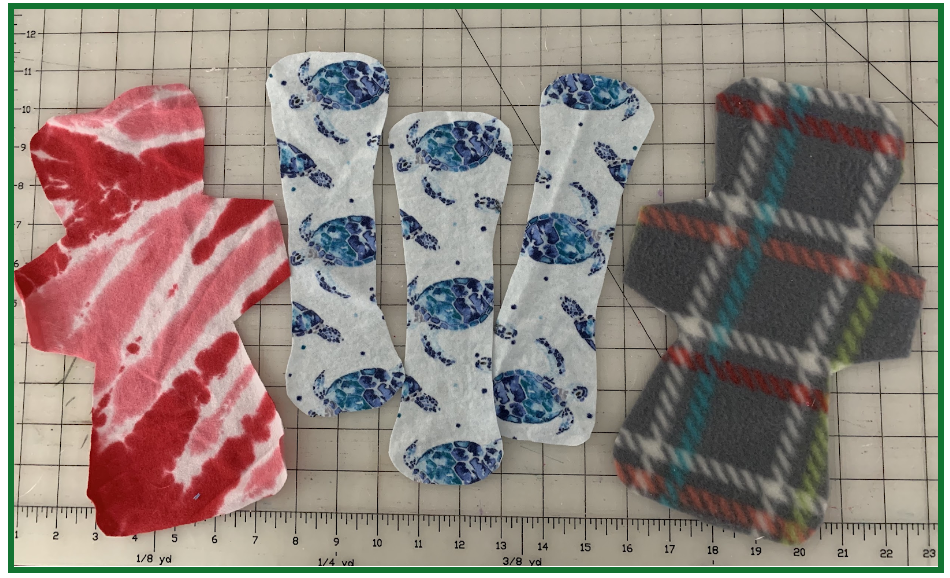
The pieces you will have cut before we begin sewing are as follows: 1 topper (mine is red tie dye), 1 backer (grey plaid fleece), and the number of cores you decided on in the previous step (blue turtles). You may wish to iron the topper and cores if you didn’t before cutting. In this tutorial, I will only demonstrate the “turn and top-stitch” method as I feel it’s most accessible for beginning sewists with a single machine or no machine.
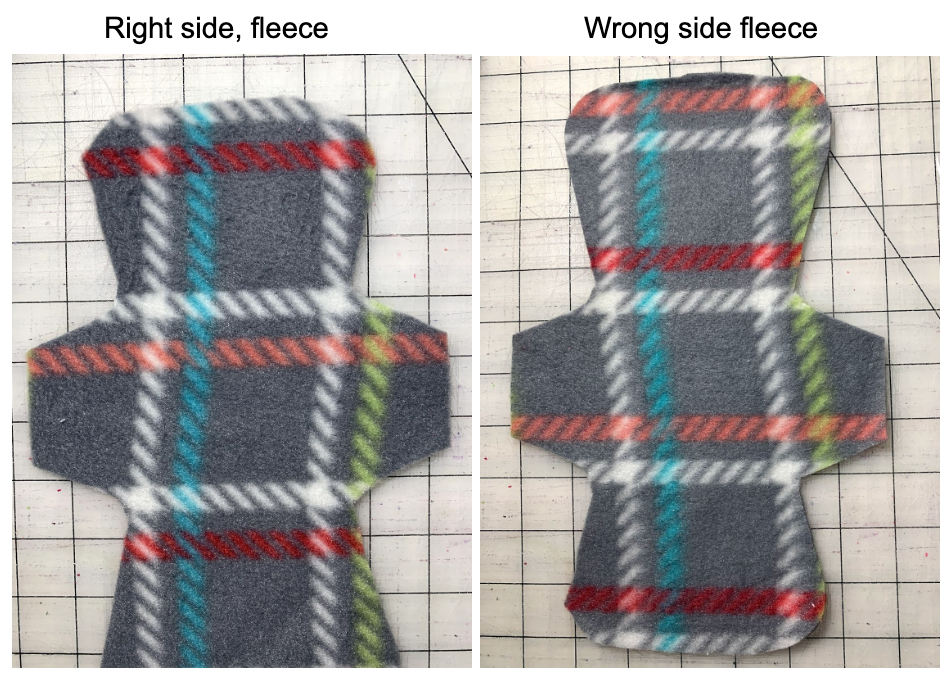
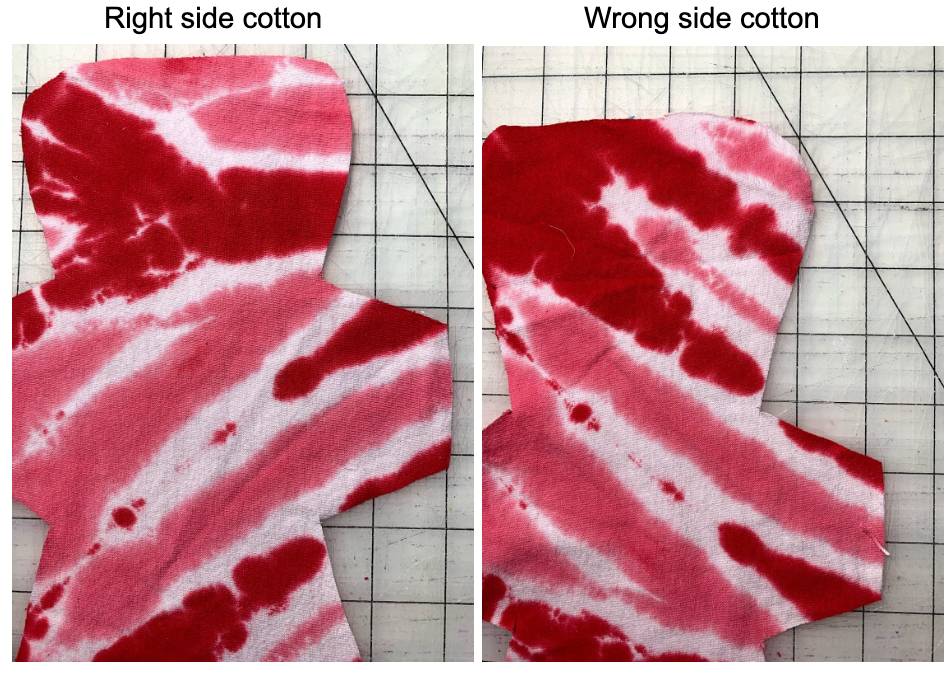
I will refer to the “right” side and “wrong” side of the fabric throughout this tutorial. The “right” side is the pretty side, it’s the one where the print is most vibrant for most cotton fabrics. If you’re not sure, it probably doesn’t matter. This is the side of the fabric that will be visible when the pad is finished. For most fleece, it’s the “fluffier” side.
Attaching the Core to the Topper
For now, set your backing aside. The quickest and easiest option to hold your layers together before you sew is to use a washable glue stick. Alternately, you can pin the layers together. Place your topper *right side* down on the table.
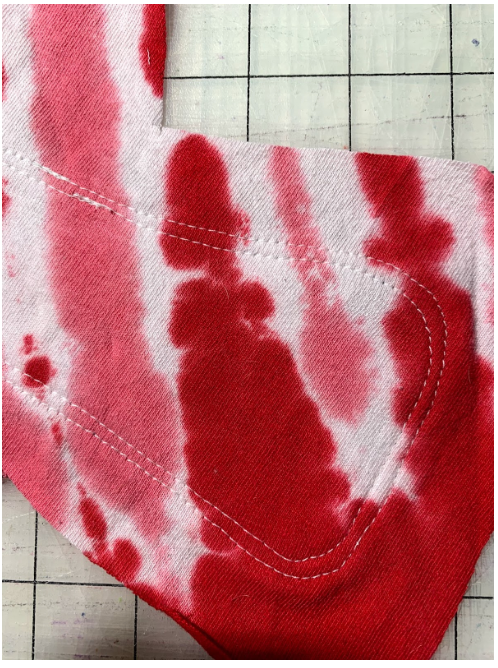
Glue one layer of the core fabric in the middle of the topper on the *wrong side.* Glue the next core piece on top of that core. Repeat for each core piece that you cut, stacking each on top of the previous core. Here you can see the 3 core pieces stacked on top of the topper, each glued securely.

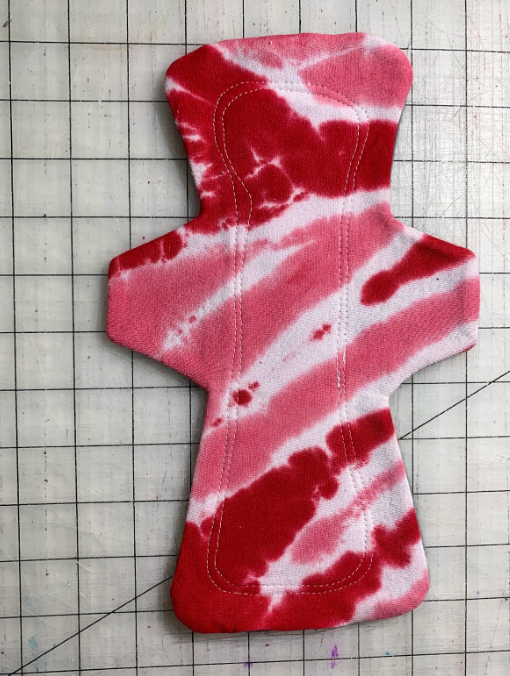
Using a sewing machine or needle and thread and a medium stitch length, sew close to the edge (about ¼”) all the way around the core. Stitch through all layers, securing all of the core pieces to the topper.

When you return back to your starting point, secure threads by using a locking stitch, backstitching, or tying off. You may want to make a channel by doing another line of stitches all the way around, about ⅛” from the one you just did around the core.

Optional: You may want to make a channel by doing another line of stitches all the way around, about ⅛” from the one you just did around the core. This can prevent liquid from traveling out to the edges of the pad, causing leaks.
Assembling Your Pad
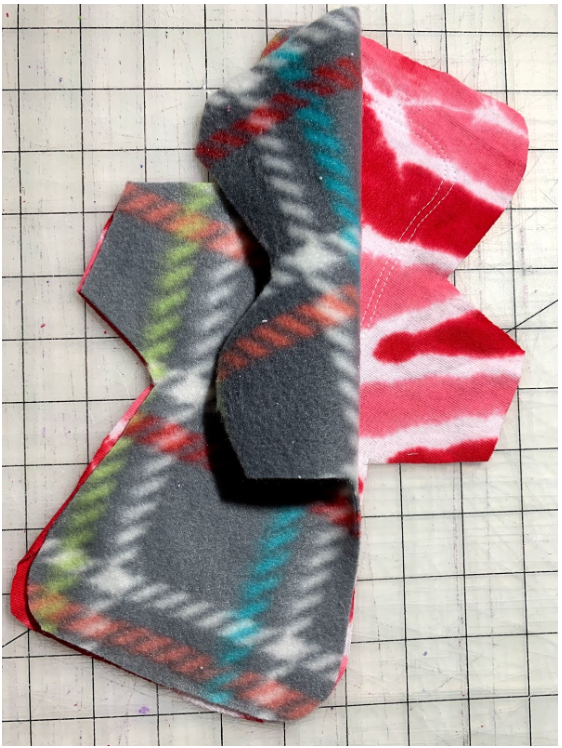
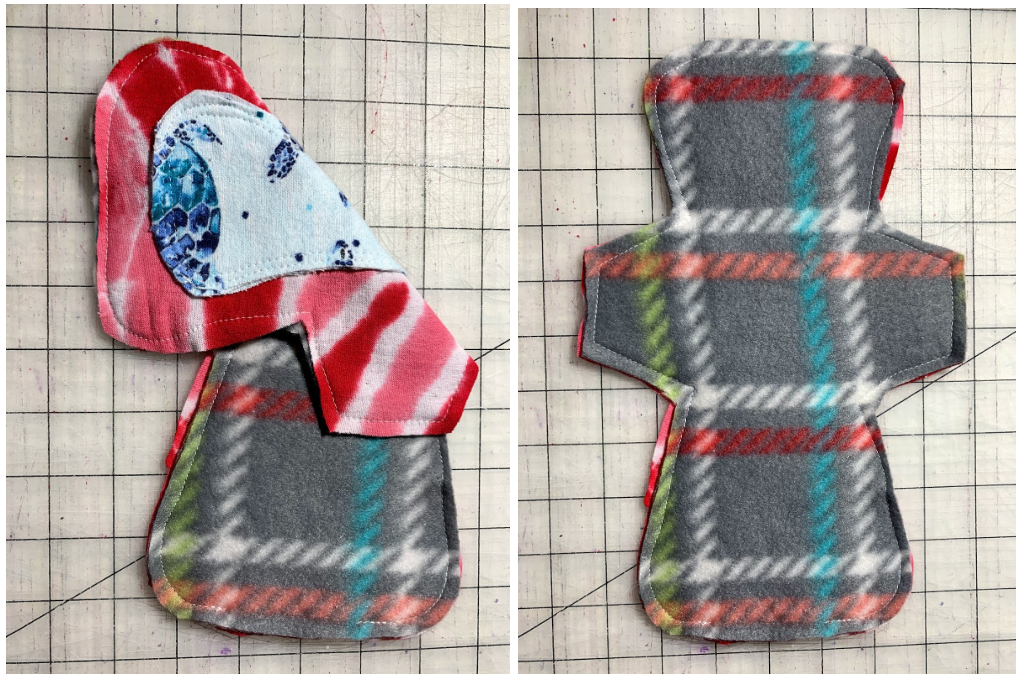
Now place your pad *wrong side* down on your sewing surface. You will be looking at the side with the stitching and will not be able to see the cores. Place your backer (plaid fleece) on top, with the *right sides* of the fabric sandwiched in the middle.
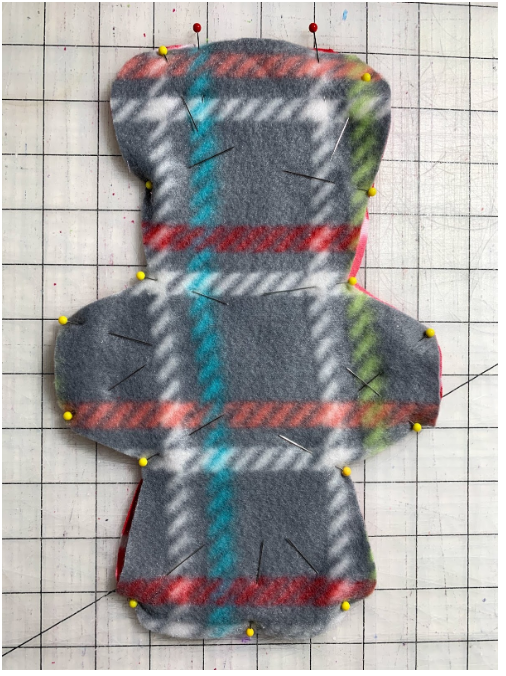
Secure all the way around with pins (or clips if you’re using PUL). I used red pins to indicate where I will start and stop when I am sewing these layers together. Beginners may want to mark with a pen or pencil so you remember to leave a small opening.
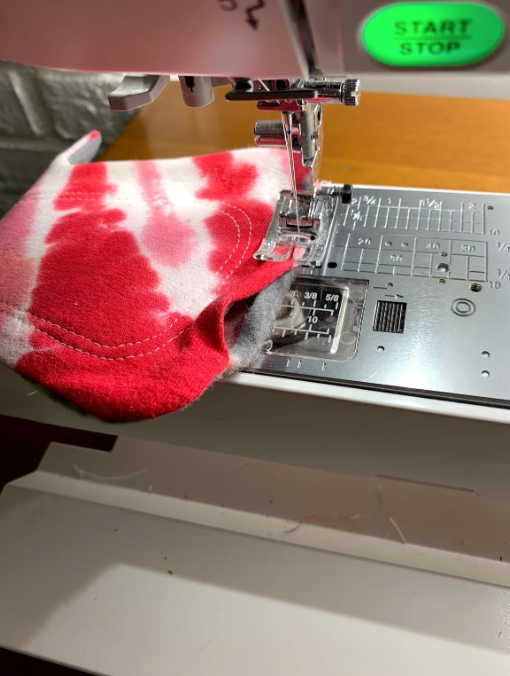
Take your pad back to the sewing machine or grab your needle and thread. Using your standard stitch length, begin close to the corner on the longest flare end. Stitch ¼” in from the edge of your core and backer. Using a locking stitch, backstitch or tie off to secure. DO NOT stitch over pins!! Remove them just before stitching over that spot.
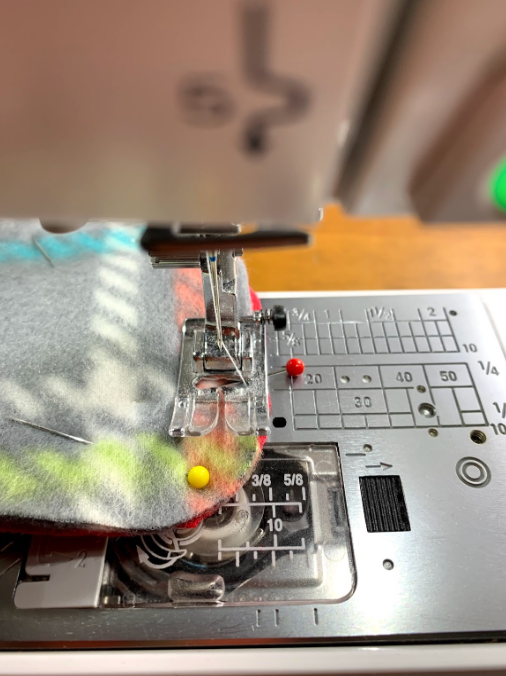
Stitch slowly along the edge of the pad. Take care when turning the rounded edges to maintain an even seam allowance all the way around. When you reach about ¼” from the sharp corner at the wings, lower your needle into the fabric. Raise your presser foot and turn your fabric so that your presser foot is now angled to stitch the first flat edge of the wing. Repeat at each sharp corner on the wing.
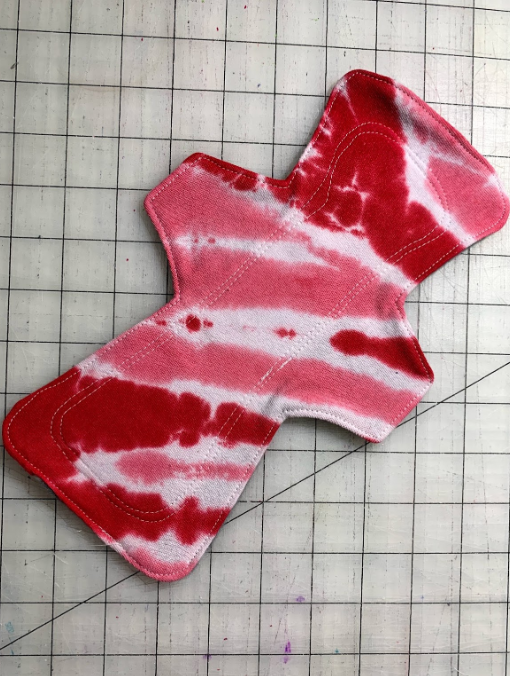
Continue stitching all the way around the edge of the pad. Remember to stop just after turning the final curve on the back flare, leaving about a 2” opening along the edge. Use a locking stitch, backstitch or tie off. Your pad should now look like this, with stitching all the way around the topper and backer, with a small opening at the large flare.
Turning and Top Stitching
Use your fabric scissors to clip the excess fabric from the corners of the wings. Take care to clip close to the stitches, but don’t go through them. You may also want to make a small clip in the inside corners of the wings to help the pad lay more flat when finished.
With your thumb, reach inside the small opening you left. Begin flipping and pulling gently to bring the right side through the hole to the outside.
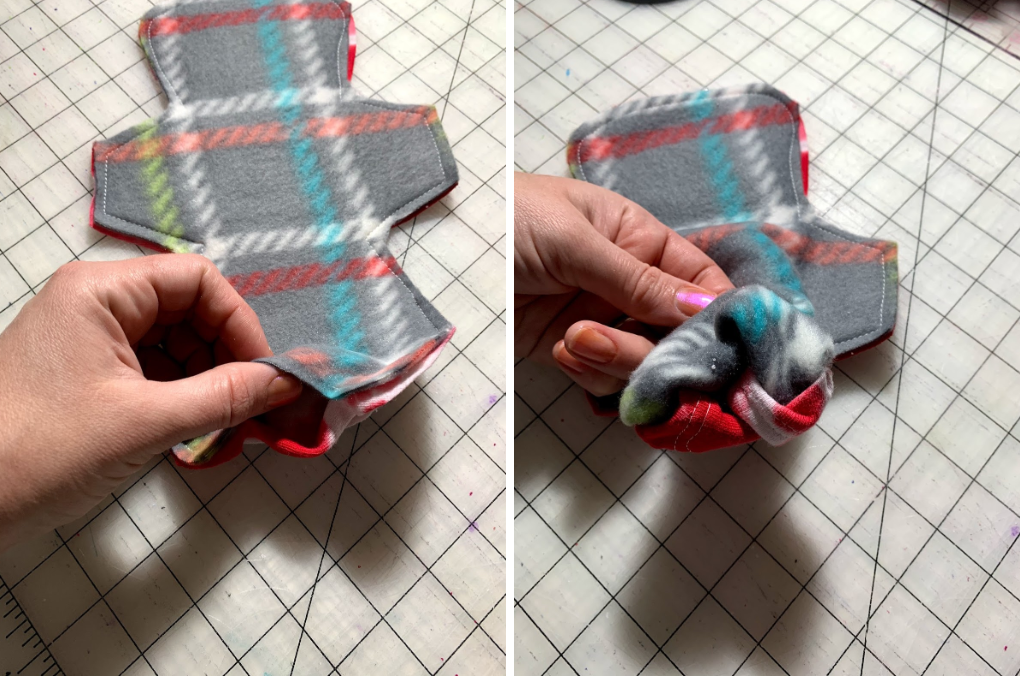
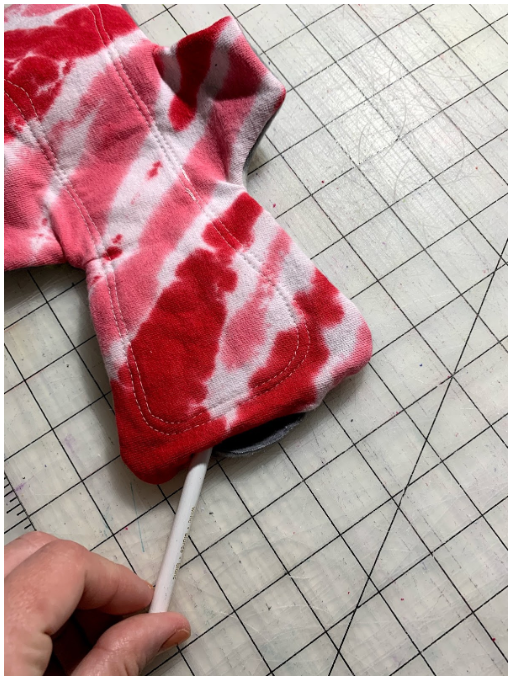
Continue until the entire pad is turned to the right side. Often, the small corners and edges will “hide” inside the pad. I like to use a dull pencil to make sure I have all of that out. You can use a turning tool, chopstick or blunt tweezers to stick down into the pad and push all of that fabric out. The fabric along the open edge will pretty naturally tuck towards the inside. You can squeeze with your finger and thumb to make it uniform with the other seams.
Press with a steam iron on polyester/ medium heat setting (if you’re not using PUL). Now all of the corners and edges should lay flat and have a uniform look all the way around. We’re almost finished!
One last trip to the sewing machine or with your needle and thread. Begin stitching across the opening at the flare ⅛-¼” from the edge. Stitch all the way around this time, leaving no openings. Again, take special care at the curved edges and raise your presser foot for sharp corners. Use a locking stitch, back stitch or tie off when you return to the beginning.
Tada! All that’s left is to add the fastener of your choice to the wings. Most folks choose plastic snaps, you could also use hook and loop or metal snaps (could be prone to rust).
Kaity Japikse is a former TCO advocate and Board Member who lives in Ohio.